Featured post

Hello and Welcome to my Blog!

A-k-a, my public learning diary for my 3D animation degree and since graduating, my free-time independent 3D studies and personal projects ...

Showing posts with label Texturing. Show all posts

Saturday, 18 September 2021

Tunnels: Scene Building in Unreal Engine and World Alignment

Continuing on from my last post, the initial plan I had did not work for me. I had a low poly mesh with the high poly bake on the rocks but I had the problem of visible seams - it was obvious where my different sculpts met and real tunnels aren't like that.

Decimated and untextured - visible seams where rocks touch each other

So how did I disguise those seams? 

Unreal engine has a node called "World Alignment" and it doesn't use UVs to project textures instead it uses real world positioning instead and if you've got a tileable texture there's no problem! In the image below, those rocks are decimated high meshes that have had no UV mapping done whatsoever.

Base Colour World Alignment Set Up

Normal Map (not a bake) World Alignment Set Up

World Align Result

Close up of removed seams


Fun material update - I've incorporated oil coming from the walls. In the books the Everneath is guarded by creatures called "shades" who are basically people who have turned into figureless floating shades of oil who have access to areas of the Everneath no one else does - not even the Queen.

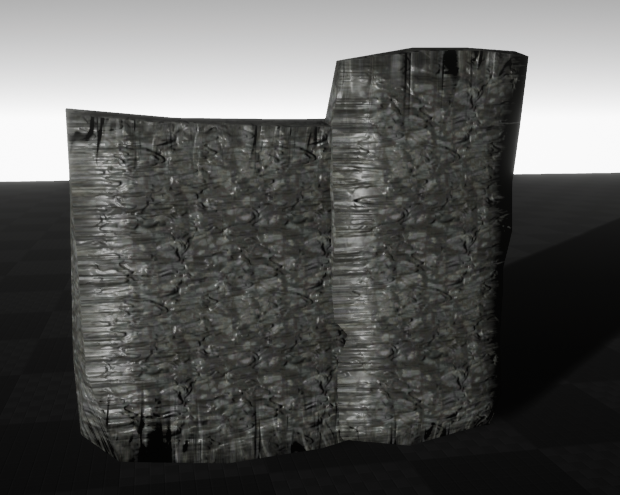
If you are trying to use a world align node on a mesh with a very low poly count you will get poor results as shown below:


Using the rocks below, I put a lattice on them to give curve shape variation so the tunnel can curve over. Now I have my pieces, time to build the scene and light it!


Friday, 6 August 2021

Tunnels Art Direction and Stylisation

The aim of this post is to figure out the art direction I'm going to go with and here's the final result (for now) that I plan to use for the main texture, the white represents emissive which will be used as a mask for the VFX I completed in unreal engine.

I started initially with a couple basic rock sculpts and layered them to see what that might look like. I also tried out some brushes I found online and accidentally made cookies:


I then started looking into making lava rock material and just my luck - there were a bunch of tutorials on how to do this in blender - small problem, I don't think you can export material maps you've made in blender. Also when I clumped the rocks together and put this material on... Looked like very unhealthy poop haha!


So I started looking away from this more realistic style towards something more stylised. My research led me to an amazing tutorial by Luc Chamerlat: https://www.artstation.com/chamerlat/blog/daPE/how-to-create-a-simple-stylised-lava-using-substance-designer

Stylised Lava by Luc Chamerlat


This served as a great base to start experimenting with what I want my rock textures to look like! Taking into account how lava tunnels form, I want it to look like there's layers of solidified lava with remnants of ebbing flow patterning the walls.


Modular Rock Pieces:


My scene will be constructed by placing modular rock pieces I've made like lego bricks as demonstrated in the example below from: https://80.lv/articles/clinton-crumpler-closed-quaters-environmen-design/


The sculpts will be a canvas for my textures. The workflow for my sculpts started with the clay build up brush to find the main shapes, I then used the trim dynamic brush to flatten it which created some cracks and then I used the trim smooth border brush, (found in the lightbox tab > trim folder) to create better edges and some more cracks. I also occasionally used the clip curve tool to create clean slices and cut into the edge of the stone wall. 


In blender, I then used a lattice to create some curve variations.


Ready to decimate, UV map, bake and bring into unreal engine.