This post is an additional test/learning lesson from my ZBrush cat series I started last year in which I introduced myself to basic XGEN and Maya's retopology tools, I also experimented with sculpting stylised fur and general displacement maps.
The original intention when starting out was I wanted to create a vector displacement map that projected the long fur model onto the no-fur cat sculpt that was retopologised. I struggled with this for a while and was something that was picked and dropped a few times. But finally, FINALLY, I've figured it out.
When working with a render engine, the less poly count it has to calculate the faster it will render. Retopologising the no-fur cat sculpt lowers that poly count drastically and is what should be done if this were an asset for a scene, (alongside UV mapping of course). But for this learning experiment I haven't because a) the same logic/technique applied should work on something that's retopologised too and b) in my screenshots above, that retopology is probably still too high a poly count than what it needs to be. I have since then discovered ZBrush's zremesher that creates a good starting point for retopology.Ignoring the no-fur cat from this point on. Looking at vector map generation you need a low sub division level and a high one, this is so the vector map can calculate how to displace the low resolution mesh to look like the high resolution mesh without the hours of render time.
Throughout sculpting, clever me, repeatedly deleted all lower sub division levels, "Nice one, Paris!".
Problem 1: How do I get those lower subdivision levels back?
You duplicate your high resolution mesh and you use the ZRemesher to drastically lower your poly count, making the left image look like the right.
You then build up those sub division levels, keep dividing until the low poly mesh has round about the same poly count as the high resolution mesh. Then you project the details from the high poly mesh onto the low poly's highest sub division level.
The short video below demonstrates this in more detail:
After that I exported my model on its lowest subdivision and imported it into Maya, (for this practice I auto unwrapped my UVs in ZBrush).
Now this is where the real struggle kicked in.
Problem 2: Getting the right Vector Displacement Map (VDM) to work.
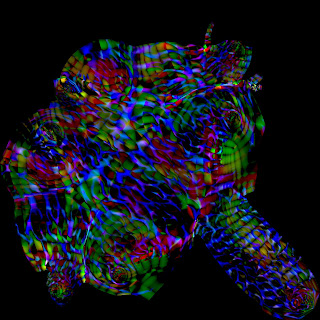
Turns out VDMs need to be mostly green. The first dozen attempts I kept getting results similar to this... (I even jumped ship at one point and tried using height and normals maps... Nope - don't do that.)
Just in case for some reason this video gets taken down, I've screenshotted the settings below.
Zbrush:
ZBrush kinda has its map settings all over the place, in the ZPlugin there are 2 sub categories for Vector Displacement under the Multi Map Exporter, one is "Vector Displacement" the other is couple options below that and is labelled "Vector Disp Map". There are also settings hidden under the "File names" button which may need changing (right image).
When you're finished with the settings, go back to the Multi Map Exporter in ZPlugin and press Create All Maps.
Maya:
Hypershader settings:


No comments:
Post a Comment